Tuesday, March 31, 2009

Eggplant Parmesan & Eggplant Prep Tip

Eggplant Parmesan
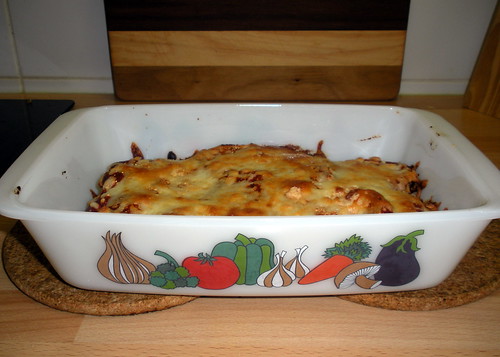
Don't you love my cute new casserole dish? I found it at the thrift store a couple weeks ago!


2 eggplants (aubergines), sliced into 1/4" thick slices and "sweated" (see below)
1 egg, beaten
2ish cups Italian seasoned bread crumbs (usually I make my own)
3 cups spaghetti sauce of your choice (homemade is best, but I'm not anti premade either!)
1 cup shredded mozzarella cheese
1/4 cup grated Parmesan cheese, divided

Dip eggplant slices in egg, then in bread crumbs. Place in a single layer on a baking sheet.

Bake at 375 F (175 C) for 5 minutes on each side, just to brown them a bit. Leave the oven on, you'll need it again in a minute.

Assembling the eggplant parmesan is pretty similar to putting together lasagna. First a layer of sauce, then a layer of eggplant, layer of cheese, rinse, lather, repeat. Okay, maybe not the rinsing and lathering part!! End with a layer of mozzarella and parmesan cheese. You can sprinkle a little fresh basil over the top if you feel so inclined. I didn't have any when I made this batch.

Bake for about 35 minutes, or until the cheese has browned nicely.


***

Eggplant Preperations

The larger the eggplant, usually the tougher the skin. I used little teeny eggplants this time around, so I didn't bother peeling them. If you use a big eggplant you may want to peel it. You can slice the eggplant either lengthwise or crosswise. Lay the slices on a tray and sprinkle a little bit of salt over them. I like to prop one edge of the tray up so that the liquid drains off to the side.

Salting the eggplant draws out the excess moisture and helps counteract the bitterness found in the seeds. This process is called "sweating." Aptly named, as you can see.

Picture 2340


Let the eggplant sweat for about a half an hour and then blot it with a damp paper towel.

Check out Tasty Tuesday @ Forever Wherever and Tempt my Tummy Tuesday @ Blessed with Grace for more yummy recipes.

Monday, March 30, 2009

Paper Wreaths

Here's the finished product from my sneak preview.

nobgpaperwreath

A paper wreath!

I stumbled over this tutorial the other day and decided I needed to have one! I used paper (cardstock actually) from the Winnie's Wall line by s.e.i., but I think it's been discontinued. The next one of these I make I am going to try to use a lighter weight paper. This ended up being okay, but it was a bit fiddly to work with. I also didn't attach each "leaf" individually. I found it worked better to staple groups of three and then fill in with single leaves where they were needed.

I was having a bit of a strange time hiding the stapled bits when I was trying to meet in the middle at the top, so I decided I'd hide it with this ribbon "flower." Martijn said he thought the jewel was a little bit cheeky but it worked! I think I agree.

Paper Wreath

I dug around and found a few more fun examples and tutorials for other styles of paper wreaths.


This Surprisingly Simple Paper Wreath from craftystylish.com is kinda neat. I think it would be fun to experiment with different color schemes. I might not put the berry dots on at the end, but that's just me!

The wreath on the right is the Photo Wreath from Inspire Me Crafts. I've seen some of these done with book pages and illustrations that are neat too.


This Reused Wrapping Paper Wreath is a great idea. Why throw the paper away when you can refashion it into something fun!

I think the Loopy Paper Wreath would look awesome in reds and pinks for Valentine's Day.


Next we've got the Retro Inspired Paper Straw Wreath. I like this one too, it reminds me of those old starburst clocks.

Last but not least, the Folded Paper Star Wreath. The instructions for this one are on Slide 3 of the article.

I think it's time to wrap this baby up, I have typed the word wreath so much it's starting to sound funny and not like a real word!

Sunday, March 29, 2009

Comment replies going into the abyss? An easy fix!

Today I would like to tell you a story about a girl who liked to blog. She also really enjoyed getting comments and often tried to reply to them but the big bad noreply-comment@blogger.com kept thwarting her plans! Any comment she tried to send would be eaten by the big black hole of the big bad noreply-comment@blogger.com. This made for one sad blogger, she really wished to communicate back to her readers. Of course she could always reply via her blog, but oftentimes people don't go back and read replies!

The moral? Blogger doesn't give me your e-mail address to reply to comments unless you tell it to. You can do this quite easily.

1- Go into your Blogger dashboard.

2- Click on "Edit Profile."

3- Under the "Privacy" heading, click the ticky box next to "Show my e-mail address."

4- Scroll a little further and enter the e-mail address that you wish to have comment replies go to. If you don't want your private e-mail address floating around cyberspace, I recommend setting up another gmail or yahoo e-mail account.

5- Scroll all the way to the bottom and click "Save Profile."

See? Five easy steps! Now people can reply to the comments you leave on people's blogs via e-mail. Please pass the word around! And thanks to Amy for replying to one of MY comments via e-mail and making me curious enough to dig around and figure out what on earth is going on!

One more thing- this will only work if you have a Blogger account. Otherwise I think the e-mails still end up going into the abyss. I'm still looking into this.

Saturday, March 28, 2009

Sneak Preview

Here's a little peek at my current project.

Picture

I'm not quite finished yet, so you'll just all have to wait in suspense one or two more days! If I have some matching ribbon in my stash then you can see it tomorrow, if not you'll have to wait until Monday.

Friday, March 27, 2009

PSA: False Advertising

I feel that it is my duty to inform all of you nice kind people that read my blog about this dastardly and deceptive false advertising.

ungoodgoodnoodles

These noodles that proclaim themselves to be "good" are not good. Not good by any stretch of the imagination. One could expect that if a company felt their product was SO superior that they could just name it "good" that the product might actually be... well, you know... good? It even declares that they are "special." If by special you mean "especially gross" I suppose it would be accurate.

If you do decide to try them, don't say I didn't warn you.

Thursday, March 26, 2009

Confessions

Remember this post in which I observed that it was starting to look like spring?

Well.

I lied.

Wednesday, March 25, 2009

Helping Combat Depression

I've been going back and forth trying to decide if I wanted to write this post and decided on posting it in the hopes that maybe it can help someone.

Those close to me are aware that I struggle with depression. It's more of a chronic thing with me rather than situational, so it's not something that really will ever go away. That being said, I want ME to be in control, not the depression. Sometimes it's more work than others. I put together this list of things that have been helpful to me.

Go Out-If you're sitting at home doing nothing it's far easier to get into negative thought patterns that go in circles and can be consuming than it is if you're out and about.

Exercise- As loathe as I am to admit this, I do feel better mood-wise if I've been more active. I love going out on my bike, so I can kill two birds with one stone by going out AND exercising.

Sleep- It seems a bit cruel that one of the symptoms of depression can be insomnia, because a good nights sleep can really put a new perspective on things! Be careful with this though, too much sleep isn't a good thing either.

Therapy- Finding a good therapist can oftentimes be incredibly frustrating, but if you are able to find one that you click with I think it can be very beneficial. It's not easy, and if you don't want it to work, it won't.

Medication- I don't ever think medication is 100% effective by itself, but if you can find something that works for you I think it can be an invaluable tool to feeling better about life.

Use a Lightbox- Seasonal depression (Seasonal Affective Disorder or SAD) hits a lot of people. It's especially hard here when even the non rainy days are often rather gray and gloomy. There are several options available. I use this little guy:
goLITE
It's a goLITE. It uses a blue light technology which is better for me since it doesn't emit UV rays. Someone somewhere is laughing at the girl who needs sunshine to help with her depression but is allergic to the sun!

If you feel like you suffer from the "wintertime blues" I HIGHLY recommend looking into one of these. I use mine throughout the year, depending on the weather (sometimes I swear we go weeks and weeks without ever seeing blue skies) but I know a few people that just use them in the winter time when the days are shorter.

These are just some of the tips that work for me. I'd love to hear what others have to add to this list.

Tuesday, March 24, 2009

Onion Chopper Review

This weeks Kitchen Tip Tuesday is a product review. I'll try not to sound like an infomercial, but I really love this thing!

Picture 2330

What is it? It's an onion chopper! The Progressive International Onion Chopper to be exact. I got a chance to use my grandma's when I was in Utah earlier this year and it's really pretty spiffy.

onion chopper

You first peel your onion and cut it into thick slices (1/2"-3/4" thick). Pop it onto the cutting grid, bring the lid down and press. Viola! Nice uniformly sized onion chunks. There's even handy measuring lines along the side of the chopper.

The reviews for this chopper on Amazon range from "this is a horrible piece of garbage and should never have been invented" to "THIS IS THE BEST THING EVER INVENTED." I think it's on the better side of good, but there are a few tricks to making it work for you. First off, fresher onions seem to work better than old onions. The user guide says you can just cut the onion in half, but I find that it works a lot better if you slice the onion into thirds or fourths (if it's a mega huge onion, more slices may be needed).

The chopper is dishwasher safe (big plus) and comes with a nifty little cleaning tool. I recommend you don't lose this, it's a huge help. I think it would be awful to clean without it.

Picture 2336

I probably wouldn't use this if I was chopping more than two or three onions at once since a food processor would be faster, but for smaller chopping jobs it's great. I've also had success cutting zucchini, firm tomatoes (uh, make sure they're firm, they'll turn into tomato puree otherwise), cucumbers and carrots. I've had mixed success with bell peppers. If they're fresh, it works great. If they'd been previously frozen, not quite so great.

If you're really handy and less clumsy with a knife than I am then this tool may not be for you. However, if you stink at cutting onions into nice little dices I think it's a good investment. The model I have only has one size of blade, but I think their "Vidalia" chopper has a larger grid blade included.

I also have the garnish slicer made by this company and it died the first time we used it. It seemed like there was a flaw somewhere that caused the blade to bend and cut into the plastic. Progressive International advertises that their products have a lifetime guarantee so we contacted them... and waited... and waited... I'd about given up hope, but finally (almost 6 weeks later) one of their customer service representatives got in touch and mailed out new parts to replace the bad ones. So, the customer service was very slow, but they do seem to stand behind their products and I think that's a good thing.

For more great tips, check out Kitchen Tip Tuesday.

Monday, March 23, 2009

Little Chapel in the Woods

The weather was so nice yesterday that it seemed a shame not to go out and enjoy it.

Picture 2313

We headed to Oirschot, a town not too far from here, to do a geocache. 's-Heerenvijvers is an estate dating back to the 1600s. Now it's mostly an open forest with trails, but evidences of the fence still exist in places.

's-Heerenvijvers- Fence

We came across this kapelletje (literally "little chapel") along the way.

's-Heerenvijvers- Little Chapel

These little chapels are pretty common in the south of The Netherlands where Catholicism is the more dominant religion. Oftentimes you'll see them along the roadside. Here's a close up of the inside.

's-Heerenvijvers- Little Chapel

We did about a 3 mile walk, solving puzzles along the way, and found our cache. It was a good day.

Picture 2322

Sunday, March 22, 2009

Menu Plan Monday- March 23, 2009

click the banner and "Menu Plan Monday" for more menu planning ideas

I'm so impressed with myself. I made everything on my menu last week. Well, that's not 100% true. I didn't make the bread machine pitas because I found fresh croissants at the market and they were calling my name. Other than that though, I was awesome!

The only new recipe I used last week was the Pizza Calzones and they were very good. I used more whole wheat flour and less white flour and it was perfect. I'm going to keep the crust recipe and try other fillings in the future.


This Week:

Witlof au Gratin- I have been seeing this on a few peoples blogs in the past few months and this latest post just happened to come in at a good time- the ingredients are on sale this week!

Eggplant Parmesan- I've got a recipe for this that I need to dig up and post.

Chicken Burgers and Soup- Not sure what kind of soup I'll make yet. I have lots of mushrooms, so it will probably involve those somewhere.

Drumsticks, Coleslaw, and Baked Beans

Tuna Cakes- Still looking for a recipe for these. Anyone have one that they like?

Saturday, March 21, 2009

The Efteling

The Efteling is a theme park here in The Netherlands. It's located near Tilburg, which makes it only about a 30 mile drive from Eindhoven.

I think that The Efteling has a little bit of something for everyone. There is a good mix of slightly more tame rides alongside the horrifying terror of upside down loops (I used to LOVE roller coasters like that, but I think I'm getting old because they just aren't fun for me anymore).

Picture 1134
Martijn is near the back in a yellow shirt.

The best rides though, are the slightly more mellow indoor rides like the Droomvlucht (The Dreamflight). You get into a gondola and "fly" through scenes of fairies, forests, trolls, and other fantastical things. It seems like a lot of detail goes into getting the ambience just right, and the music that goes along really fits with what you're looking at.

Picture 1147
The entrance to the Droomvlucht

Honestly though, the main reason you need to visit The Efteling is Het Sprookjesbos (The Fairytale Forest). There are more than 20 different fairy tale scenes depicted in Het Sprookjesbos.

Picture 1173
Sign pointing the way to Little Red Riding Hood

Most are inspired by the brothers Grimm, Hans Christian Andersen and Charles Perrault and brought to life with animatronics. You can watch the mean witch climbing up and down Rapunzel's long hair, the little red dancing shoes, and the wolf waiting for Little Red Riding hood among other things.
The Efteling
Collage of Het Sprookjesbos


Even the ATMs are cool!

Picture 1185
BANK!

I love clever little plays on words. The big couch is an ATM... the Dutch word for couch is bank. Get it? The bank is a BANK! Oh geez, I love it!

Friday, March 20, 2009

The Keukenhof

One of the "must sees" if you visit The Netherlands in the spring is the Keukenhof. Somewhere in the neighborhood of 7 million bulbs are planted annually so it's a wonderful treat to see them all coming up. According to their website, there are 100 varieties of tulips there.

When you visit, make sure to wear comfy shoes as there are 15 km (9.3 miles) of walking paths. I understand it is also possible to rent a bike and cycle through the flower fields surrounding the Keukenhof but I haven't had the opportunity to do that yet.

Keukenhof Mosiac

This is a mosaic that I made from some of the photos I took last year. To see the rest, you can check out my flickr set here.

Amusingly enough, tulips aren't even actually Dutch, but were imported from Turkey in the 1600s!

Thursday, March 19, 2009

More Vintage Pyrex

Picture 2209

A few months ago, I got my hands on the larger of these two dishes. I was terribly excited because it is so cheerful and is orange AND yellow. Then when Martijn and I went to the thrift store a couple weeks ago I found it's little brother and snatched it up as fast as I could. I think there's one more size in this style of dish so maybe I'll get lucky and stumble upon it too!

Now if only I could find some more casserole size dishes! I've only managed to find one so far.

 See more fun vintage goodies for Vintage Thingie Thursday over at Coloradolady's blog.

Tuesday, March 17, 2009

Pot Pie

Chicken Pot Pie

Chicken Pot Pie
2 cups cooked shredded chicken (about 200 grams)
2 carrots, chopped and steamed
2 onions, thinly sliced
2 stalks celery, chopped
1 cup frozen peas
1/2 cup frozen (canned works too) corn
2 garlic cloves, minced
2 cups chicken broth
1 tsp thyme
1 bay leaf
Pie crust- enough for top and bottom (I use puff pastry)
Dab of butter
flour to thicken

Melt the butter in a deep skillet.
Saute the onions and celery until they're soft, but not mushy.
Add garlic and cook for a couple more minutes.
Add the chicken stock and slowly stir in the flour.
Let that cook until it thickens up and starts boiling.
Add the thyme and bay leaf and let simmer for about 15 minutes.
While you're letting the filling simmer, prepare your "crust." I used two little ramekins and because I am insane I did a lattice-- completely unnecessary but it looks cute.
After you're done simmering the mixture, add the peas, carrots and corn.
Remove the bay leaf so you don't bite into a present while you're eating your pie. You may or may not want to add a little bit of salt depending on how salty your broth was.
Mix well and pour into your crust.
Add the top crust. If you used just a sheet of puff pastry, cut a slit to let steam escape.
Cook at 200 C (eh... 400 F I think) for about 25 minutes, or until the top of your crust is nice and golden brown.

I like to use the little rammekins for pot pies because it makes them just the right size. If it was more than just Martijn and I, I would just use a regular pie plate. I'm not mad enough to make tiny latticed pies for 6 people at once! This recipe makes enough to fill a pie plate, so I usually have some filling leftover and make little turnovers to have for lunch the next day.

You can also use this recipe for beef pot pies. I have had success with ground beef rolled into little meatballs instead of shredded chicken and changing the chicken broth to beef broth. I'm not a huge fan of mushrooms in the chicken pot pie, but I think they're perfect in a beef pot pie.

Check out Tasty Tuesday @ Forever Wherever and Tempt my Tummy Tuesday @ Blessed with Grace for more yummy recipes!

Monday, March 16, 2009

Signs of Spring

Picture 2277

The crocuses have been blooming the past couple of weeks, but it's still been rather chilly and grey. However, today I went outside and the daffodils are blooming! Spring is almost here!!

Sunday, March 15, 2009

Menu Plan Monday- March 16, 2009

click the banner and "Menu Plan Monday" for more menu planning ideas

Last week wasn't perfect, but it went pretty well. I made lasagna for my in-laws on Friday night and it turned out quite well.

The Brown Bag Burritos were awesome. I think that's going to be my new go to recipe for burritos. It upped the beans a little and used slightly less ground beef for mine. So so good, I highly recommend them!

I plan on carrying the Pizza Calzones over to this week. I ran out of days to make dinners in last week.

I didn't make the Quinoa Casserole, but I did make quinoa to serve as a side dish with the Chicken a la Mayo. I really like that stuff, but I need to find a new place to get it. The shop I bought it at closed. Rude.

This week:

Pizza Calzones

Pot Pies- I will post this recipe on Tuesday.

Fish Tacos

Curry Chicken Salad on Breadmachine Pitas

Sla vinken and vegetables

Saturday, March 14, 2009

Changing Weather

I didn't close the bedroom door last night, and when I woke up about 7 I thought that the light in the livingroom was on. I got up and realized that the light was not on, something even stranger- the SUN was out.

Perfect! Martijn was helping a friend move so I figured I would busy myself by going to the thrift store and the market. I even decided that I only needed a jacket since it was so nice outside.

Foggy Eyes

Yah, I live in The Netherlands. I really should know better than to count on the weather staying nice for more than 7 minutes at a time. At least my jacket had a hood.

Friday, March 13, 2009

Easter Tree

I loved reading the comments to the post a couple of days ago with the picture of the giant stack of felt. A couple of people said they would make ornaments, and that is exactly what I was making. I still plan on making several more, but I figured if I was going to make a teasing post like that then I darn well better reveal what I was up to sooner rather than later.

Easter Eggs

I'd like to do a few more of the sequined eggs, but I need to get some clear seed beads first. All I've got on hand are the purple ones (hence me doing a purple egg first) and they won't work for everything. I've also got a couple more ideas for ric-rac striped ones as well.

Years and years ago, my mom made a cool Easter tree with a white painted branch (I think a piece of sagebrush that she picked up off of the desert) mounted to a board for a base. Since I am "grown up" now and live away from home, I decided that I needed to make my own easter tree. I had been eyeballing trees and trying to figure out what sort of branch would work for this project when Martijn suggested that we call his parents and ask if we could have some of the trimmings from their curly willow. It's a good thing we called when we did because they were cutting down the tree that very day. If we'd waited to call, I would've been one sad kid.

The next quandary was figuring out some sort of base. On my mom's tree, the branch was one piece so it could easily be attached to the base. Since I had several branches this wasn't going to work. I headed to the thrift store and spent a good half hour or so going through their vases and pots trying to find something that would work. I came up empty, so I started looking at the other shelves of glassware (ok, I admit, I was looking for Pyrex) and saw a cute juice carafe. It looked like it would be just about right for the project so I went ahead and bought it.

Easter Tree

I'm still toying with the idea of painting the branches white, but my last project that involved spraypaint made me want to tear out my hair. I don't have much hair to tear out so I'm leaving it like this until I decide what to do. I put gravel in the bottom to weigh it down and a little bit of fake "moss" in the neck of the carafe to hide the bottom of the sticks a bit. I think it turned out pretty cute.

Picture 2248

Wednesday, March 11, 2009

Felty Goodness

Felty Goodness
This is my nice stack of felt. I'm hoarding it because it's so horribly horribly expensive here, but last night I pulled it out to work on something. Would you like to know what I'm working on?

Too bad, I'm keeping it a secret until I'm finished. What would -you- do with a giant stack of felt?

Tuesday, March 10, 2009

Bourbon Chicken

Bourbon Chicken and Fried Rice


You will need:

2 boneless chicken breasts, cut into 1" pieces
1-2 tbsp flour
1 tbsp oil
2 garlic gloves, minced
1" fresh ginger, grated or minced (1/4 tsp dried will work, but I think fresh tastes better)
1/4 cup apple juice
2 tbsp brown sugar
2 tbsp ketchup
1 tbsp apple cider vinegar
1/2 cup water
1/3 cup soy sauce

Heat the oil in your pan. Toss the chicken pieces in flour. Add the chicken to the pan and cook until lightly browned. While the chicken is browning, whisk together the remaining ingredients in a small bowl. Pour sauce into the pan and bring to a hard boil. Reduce heat, cover the pan, and simmer for about 20 minutes. The sauce should be nice and thick when it's done, but if you have a runny sauce you can add a little flour or cornstarch. Serve with fried rice.

Check out Tasty Tuesday @ Forever Wherever and Tempt my Tummy Tuesday @ Blessed with Grace for more yummy recipes!

Monday, March 09, 2009

Menu Plan Monday- March 9, 2009

click the banner and "Menu Plan Monday" for more menu planning ideas

Last week almost went without a hitch. I realized on Thursday that I didn't have any chicken breasts in the freezer like I thought, so we just had shoarma pitas again (which I did actually have in the freezer!).

My first experience with Quinoa was a good one. The Cream of Quinoa Mushroom Soup was really really good, and I don't really think I'd change anything about that recipe (which is rare).

The Pasta with Tomato and Tuna Sauce was alright and I'll save the recipe for when I need a relatively quick meal.

Thanks to Jessica and Vonlipi for the side dish ideas!

This Week:

Quinoa Casserole- Following on the footsteps of success with the last quinoa recipe, I'm going to give this one a whirl. I might change the spinach to broccoli, but I haven't decided yet.

White Chicken Chili- I don't have a recipe for this. One of the ladies in a group I belong to is moving and was getting rid of a lot of food so I snatched this seasoning mix for it!

Pizza Calzones- This looks like a lot of work, but if I make the whole recipe then we'll have 6 left over to put in the freezer. Now lets just hope it's delicious.

Brown Bag Burritos- New bulk burrito recipe that I'm looking forward to trying.

Chicken a la Mayo- I really am going to make this this week, chicken breasts are on sale so I can restock my supplies!

My in-laws are coming over on Friday or Saturday this week for dinner. I know what I'm going to make for dessert but I haven't decided on the main course yet. Throw your ideas at me people! I need them! I can't think for myself when it comes to things like this ;)

Saturday, March 07, 2009

This and That


A few weeks ago I ordered new sunglasses. Between the Carnaval holiday and the shop being remodeled, it took awhile for them to come in. I finally got them this week! I guess there is some strange irony in getting new sunglasses in a country that has more rainy grey days than sunny ones, but every now and then there is a nice day. Plus, they'll come in handy when I go to Utah next month! Excuse crazy hair, I cycled through a tornado to pick these up (okay not really, but it was windy).


***

Today we went to the thrift store and I was able to find a new (to me at least) food processor! It's obviously seen a few years pass in it's life, but it seemed to come with all of the blades that it would've come with when it was new. Martijn cleaned it up a bit for me and chopped an onion to test it out. This won't replace Little Choppy but I've had my eyes out for something a little bigger for awhile now. If my mom's Cuisinart would work here, I'd probably have kidnapped it. She's lucky we run on a different voltage here.

I also managed to find another JAJ Pyrex dish to match the yellow and orange one that I found a few months ago. It's the smaller dish and the lid has a bit of damage, but it's orange AND yellow. How could I resist?

Friday, March 06, 2009

Witness Protection

The ground level in our apartment building was remodeled last year and a new intercom/doorbell system was installed. When they were doing this, we filled out a form to get our new nameplates made. Not only did we have to wait 3 months to get them, but here is what they looked like:

Misspelled Nameplate

I think we got put into witness protection because they not only flubbed up my name (which is pretty common here since Dutch words don't have double consonants at the end), but they gave Martijn a completely NEW last name. I wonder what sort of secrets they thought we needed protection for having.

Thursday, March 05, 2009

De Genneper Watermolen

Picture 2178

This is the Genneper Watermill (De Genneper Watermolen) which sits a little less than a mile away from my house.

Picture 2179

The earliest writings referring to the mill date to 1249. Originally it had two wheels, one for grain and the other for oil. The mill is also featured in three paintings by Vincent van Gogh.


This mill has burned and been rebuilt several times over the past 750ish years or so. The most recent major renovation was in the 1960s, but in 1998 the roof burned off so there were some minor changes made. The wheel used to have a little roof over the top of it, but that wasn't replaced after the fire.

Currently the mill houses a feed shop on one side and a great place to buy flour on the other side (fitting for a mill I suspect).

Picture 2182

I've found some great things here. I like their Super Volkoren bread mix a lot, and it works great in my bread machine. I was happy to discover that they have cornmeal there since that was proving to be a rather tricky item to track down. They also have small chocolate chips which a lot of people say they have trouble finding. I haven't bought any because I think they're a rather dear price at €5.95 per kilo. In addition to the aforementioned items, they also have several different kinds of cake mixes, spices, and dried fruit to add into your baked goods. Their website seems to have vanished, but if it reappears I'll amend this to add the info.

Wednesday, March 04, 2009

Baked Falafel

bakedfalafelpita


I love chickpeas (kikkererwten in Dutch- which translates literally to "frog peas"). I will just sit and eat them plain I think they're so good. Since that's not such a complete meal idea I'm compelled to find good ideas for things to actually incorporate them into. I discovered baked falafel sandwiches one day as I was perusing the interwebs and decided to give them a try. I've not actually had "authentic" (deep fried) falafel so I don't know how similar it is, but this tastes pretty darn good to me!

Baked Falafel

You will need:

2 cups cooked chickpeas (about 1 cup dried or 1 large can)
1/2 cup onion, chopped finely
2-3 cloves garlic, minced
1 tbsp ground cumin
1/2 tsp salt (you can omit this if you used canned beans)
1/4 cup fresh cilantro leaves
1/4 cup fresh parsley

Combine all ingredients and mash together with a potato masher or a big fork. You can also do this step in a food processor but take care not to over "process" as the falafel balls get really crumbly and hard to work with if it's chopped too much. The texture should still be rather coarse, but make sure all of the ingredients are incorporated together and mixed well.

Since the pitas I put these into are usually rather tiny, I use my tablespoon measuring spoon to form small domes that I then gently flatten a bit. If I had larger pitas I would make larger balls because the small ones are tricky and tend to crumble if you're not careful. I'd recommend 1/8 cup to 1/4 cup size balls. Whatever size you decide to make, go ahead and roll them into balls and press them flat on your cookie sheet.

Brush a bit of olive oil over the top of each falafel. Bake at 350 F for 20 minutes, flip the falafels and bake another 20 minutes. If you've done really small ones like I usually do, I'd cut the cooking time in half. Otherwise you'll end up with little blackened discs and a sad face.

Serve in a pita with some lettuce, tomatoes, cucumbers, and top with some homemade tzatziki!
***

Tzatziki

tatzikiingredients
The finished product of this doesn't really photograph well (as evidenced by the above picture of it on the pita sandwich), so you can look at this nice picture of ingredients instead!

You will need:

1 cup yogurt (use your own, or a nice THICK Greek yogurt)
2-3 cloves garlic, minced
1/2 cup seeded and minced cucumber (this was about an 8 inch chunk of cucumber)
1/4 tsp salt, more if you decide it needs more.

Mix all your ingredients together well and let sit for a few hours in the fridge. Taste and add more salt if desired.

I know that many people put mint in their tzatziki, but I prefer it without.

Tuesday, March 03, 2009

Homemade Yogurt

Making Yogurt

Sometime last year I found this little yogurt machine at a flea market in Germany. It sat on my shelf for awhile before I finally got brave enough to give it a try. I bought yogurt starter from a health food store in Utah, but you can use unsweetened unflavored yogurt with live cultures if you can't get your hands on a starter. I plan on making my next batch with some leftovers from my first batch.

This was a little bit time consuming because you need to bring the milk up to a high heat, then let it cool a bit and keep it at a consistent temperature for several hours afterwards. Luckily you don't need to babysit it the whole time, but you will want to have a thermometer to keep track of things. The yogurt machine is basically a little incubator. It keeps it at a consistent temperature. If you don't have a yogurt machine, I understand a heating pad placed under your container(s) and a towel on top will also work.

You will need:
4 cups milk (I used 1.5%)
1/3 cup powdered milk (from reading it looks like this is optional, but it will make for a thicker yogurt)
Yogurt starter or 1/2 cup pre-made yogurt.

In a heavy bottomed pan, slowly heat the milk over a low-medium heat. Add your powdered milk. You will want to bring the milk up to a temperature of 170 F (77 C) without it boiling. My thermometer is on a probe so I could hang it over the edge of the pan to keep track and I've also seen them with clips that hang on the side of the pan. Once you hit 170 F (77 C), remove from heat and let the milk cool. This time your aim is to cool the milk to a temperature of about 110 F (44 C). You can put the pot in the fridge so that it will cool faster, but I just let it sit out until it was cooled enough.

When the milk is cool enough, add your yogurt starter (or pre-made yogurt). Mix well.

Pour into your containers. As you can see in my picture, I have 6 little containers so I split the amount of yogurt between each cup. I don't see any reason that you couldn't just use one big jar.

You want to keep your yogurt warm (110F or 44C) for 4-8 hours. As I understand it, the longer you leave the yogurt the thicker and tarter it will become. I kept mine in the yogurt machine for about 5 1/2 hours and then put it in the fridge. Let the yogurt hang out in the fridge overnight and it'll be ready to eat the next day.

You can add your goodies into the yogurt before eating. This was pretty good plain, but I did add some sweetner and raspberries to one of the jars I ate.

Monday, March 02, 2009

Menu Plan Monday - March 2, 2009


click the banner and "Menu Plan Monday" for more menu planning ideas


Last week went pretty smoothly.  I didn't make the won ton tacos because I had less leftovers than I had anticipated.  I also ended up making bourbon chicken (watch for that recipe this week) and fried rice.  It's one of Martijn's favorite meals and he was having a bit of stress so I thought he'd enjoy it. 

This week:

Quinoa Mushroom Soup and Melt Sandwiches- I have this bag of quinoa that's been sitting on the shelves for months.  I look at it and put it back but THIS WEEK I SHALL CONQUER THE QUINOA! 

Pasta with Tuna and Tomato Sauce (recipe is in Dutch)- This has both broccoli and tuna fish in it and as luck would have it both broccoli and tuna fish are on sale this week!  I'm going to leave out the capers though, I really find them dreadful.

Fabulous Freezer Chicken Drumsticks - I have some of these in the freezer from the last time I made them.

Chicken a la Mayo - I'm going to try this but sub yogurt for part of the mayo. 

Fish Sloppy Joes - We haven't had these for quite a while and they sound tasty.

I'm not sure if Martijn will be having his not-always-but-usually-weekly
dinner this week and if he doesn't we'll probably add on something easy
like roasted chicken wings.

I'm really terrible with planning side dishes.  I usually toss in a steamed veggie of some kind, but I'd love to hear what your favorite (easy is a plus too) side dishes are.  I need to stash some ideas in my recipe files!
Related Posts with Thumbnails